接着上一篇的来,上一篇介绍了环境搭建及做好了底部的导航栏模块,接下来继续完善首页。
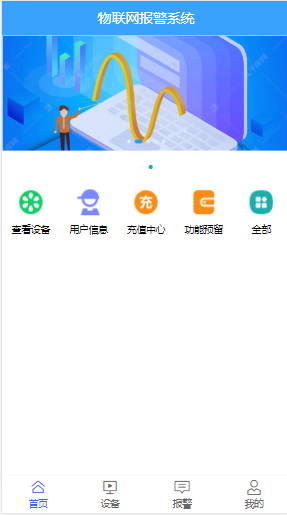
先来张最终效果图:
记录下之前遇到的问题,Vue中img图像src变成"[object Module]"无法正确加载的问题。
我在vue项目的js代码中,使用了"imgUrl"=require('../asserts/image.png')这种形式。网上查了很多资料,说是因为file-loader默认采用ES模块语法,即import '../image.png';然而Vue生成的是CommonJS模块语法,即require('../image.png');二者不一致。要么让file-loader或url-loader采用CommonJS语法,要么让Vue采用ES语法。
但是我找了下项目中的各个文件,没找到在哪能改esModule: false的选项,于是暂时作罢。
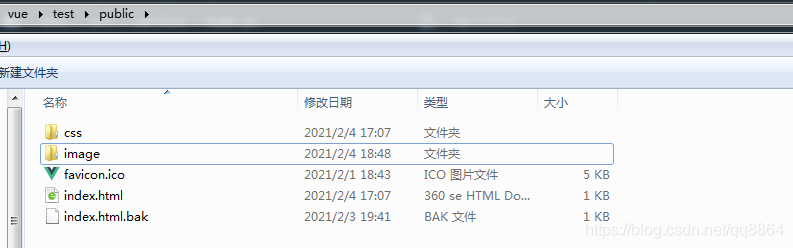
最终我找到的折中的办法,本地图片和css资源都放在public目录下,这样就可以了。
本地的css文件在index.html文件里加载,如:
<link href="<%= BASE_URL %>favicon.ico">
<link href="<%= BASE_URL %>css/font_nbicon.css">
<!DOCTYPE html> <html lang="en"> <head> <meta charset="utf-8"> <meta http-equiv="X-UA-Compatible" content="IE=edge"> <meta name="viewport" content="width=device-width,initial-scale=1.0"> <link href="<%= BASE_URL %>favicon.ico"> <link href="<%= BASE_URL %>css/font_nbicon.css"> <title>物联网报警系统</title> </head> <body> <noscript> <strong>We're sorry but <%= htmlWebpackPlugin.options.title %> doesn't work properly without JavaScript enabled. Please enable it to continue.</strong> </noscript> <div id="app"></div> <!-- built files will be auto injected --> </body> </html> 以下是轮播图模块封装,本地的图片放在public目录里,使用时直接引入路径即可:
在components目录下新建Swiper.vue组件:
<template> <van-swipe class="my-swipe" :autoplay="3000" indicator-color="#1baeae"> <van-swipe-item v-for="(item, index) in list" :key="index"> <img :src="item.imgUrl" alt="暂无图片"> </van-swipe-item> </van-swipe> </template> <script> export default { props: { list: Array }, methods: { } } </script> <style lang='less' scoped> .my-swipe { display: flex; flex-shrink: 0; flex-wrap: wrap; width: 100%; padding-top: 45px; img { width: 100%; height: 100%; } } </style> style调整界面的less写法,
display: flex;含义为使用flex布局。
padding-top: 45px;为轮播图最上面的titile留出45px的位置。
js的props属性里增加了个list,类型为Array,作为子组件接收属性。
接下来看看首页Home.vue里如何用:
import swiper from '@/components/Swiper'
先import引入进来,export default的components里注册组件。
template模板标签里这么使用: <swiper :list="swiperList"></swiper>
注意setup(),ref,torefs,reactive都为vue3的新用法,setup是Vue3 的一大特性函数 。
setup函数是处于 生命周期函数 beforeCreate 和 Created 两个钩子函数之间的函数。
setup函数是 Composition API(组合API)的入口。
在setup函数中定义的变量和方法最后都是需要 return 出去的 不然无法再模板中使用。
在执行 setup函数的时候,还没有执行 Created 生命周期方法,所以在 setup 函数中,无法使用 data 和 methods 的变量和方法。
setup函数只能是同步的不能是异步的。
旧的Vue2.0 Options API 和 新的Vue3.0 Composition API 区别
Vue2.0 Options API 约定:
我们需要在 props 里面设置接收参数
我们需要在 data 里面设置变量
我们需要在 computed 里面设置计算属性
我们需要在 watch 里面设置监听属性
我们需要在 methods 里面设置事件方法
你会发现 Options APi 都约定了我们该在哪个位置做什么事,这反倒在一定程度上也强制我们进行了代码分割。
现在用 Composition API,不再这么约定了,于是乎,代码组织非常灵活,我们的控制代码写在 setup 里面即可。
setup函数提供了两个参数 props和context,重要的是在setup函数里没有了this,在 vue3.0 中,访问他们变成以下形式: this.xxx=》context.xxx
我们没有了 this 上下文,没有了 Options API 的强制代码分离,Composition API 给了我们更加广阔的天地。
接下来说下ref和reactive。vue3在9月18号晚上发布了,在vue3中对响应式数据的声明官方给出了ref()和reactive()这两种方式。
双向数据绑定,vue一共提供了两种数据响应式监听,有点React Hooks的味道。ref 函数传入一个值作为参数,返回一个基于该值的响应式Ref对象,该对象中的值一旦被改变和访问,都会被跟踪到,就像我们改写后的示例代码一样,通过修改 count.value 的值,可以触发模板的重新渲染,显示最新的值。
其实,除了 ref 函数,Vue3.0中还提供了另外一个可以创建响应式对象的函数,那就是 reactive 函数。下面就来说说为什么要提供两种API
ref写法简单,但也有弊端,经过尝试发现他只能监听一些如数字、字符串、布尔之类的简单数据。
ref修改数据需要使用这样count.value=xxx的形式,而reactive只需要state.reactiveField=值这样来使用。
reactive在return时候需要toRefs来转换成响应式对象。
toRefs函数能将reactive创建的响应式对象,转化成为普通的对象,并且这个对象上的每个节点,都是ref()类型的响应式数据。
在Vue中使用可以直接使用ref (template中),Vue会自动添加.value。在Js中使用ref需要.value。
setup函数必须有返回值,必须返回个对象。
setup函数有一个props参数,用于接收props,也就是定义在组件上的属性(同vue2),但是接收的props必须先在props属性中定义,否则是不会被接收到。
vue2的所有生命周期写法与vue3兼容,而在vue3中,生命周期添加了on前缀,需要导入并写在setup()函数中。
<template> <div> <header class="home-header wrap" :class="{'active' : headerScroll}"> <div class="header-search"> <span class="app-name">物联网报警系统</span> </div> </header> <nav-bar /> <swiper :list="swiperList"></swiper> <div class="category-list"> <div v-for="item in categoryList" v-bind:key="item.categoryId" @click="tips"> <img :src="item.imgUrl"> <span>{{item.name}}</span> </div> </div> </div> </template> <script> import navBar from '@/components/NavBar' import swiper from '@/components/Swiper' import { getHome } from '@/service/home' import { Toast } from 'vant' import { reactive, onMounted , toRefs} from 'vue' export default { name: 'home', components: { navBar, swiper }, setup() { const state = reactive({ swiperList: [] ,// 轮播图列表 categoryList: [ { name: '查看设备', imgUrl: '/image/kj1.png', categoryId: 100001 }, { name: '用户信息', imgUrl: '/image/kj2.png', categoryId: 100002 }, { name: '充值中心', imgUrl: '/image/kj3.png', categoryId: 100003 },{ name: '功能预留', imgUrl: '/image/kj4.png', categoryId: 100004 }, { name: '全部', imgUrl: '/image/kj5.png', categoryId: 100005 } ], }) onMounted(async () => { Toast.loading({ message: '加载中...', forbidClick: true }); const { data } = await getHome() console.log(data) state.swiperList = data.swiperLists Toast.clear() }) const tips = () => { Toast('敬请期待'); } return { ...toRefs(state), tips } } } </script> <style lang="less" scoped > @import '../common/style/mixin'; .home-header { position: fixed; left: 0; top: 0; .wh(100%, 45px); .fj(center); line-height: 45px; padding: 0 15px; .boxSizing(); font-size: 15px; color: #fff; background: #39A2FD; z-index: 10000; .app-name { padding: 0 5px; color: #ffffff; font-size: 18px; } } .category-list { display: flex; flex-shrink: 0; flex-wrap: wrap; width: 100%; padding-bottom: 13px; div { display: flex; flex-direction: column; width: 20%; text-align: center; img { .wh(36px, 36px); margin: 13px auto 8px auto; } } } </style>至此,首页基本设计完成,接下来会继续介绍个人中心页面的详细设计过程。先来张截图吧:

下一个:Feign 异常传递